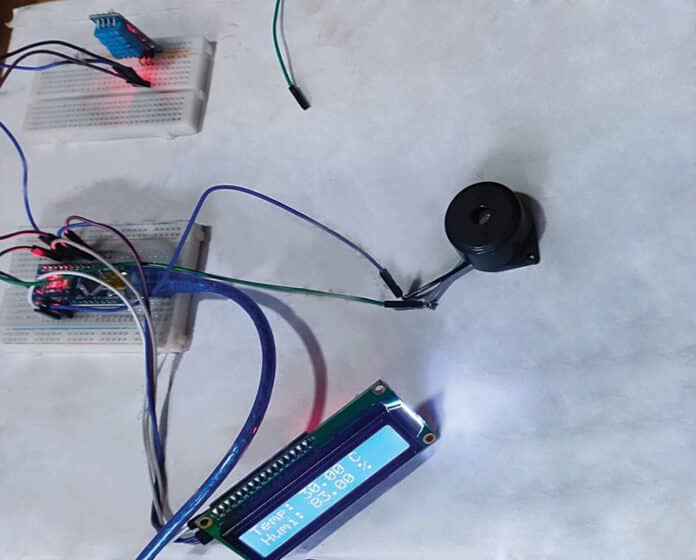
With a dedication to Empowering Farmers with Smart Farming, we build a wheat germination monitoring system. But why this system is needed and how farmers will benefit from this? Let’s understand this first!
Wheat farming is a big deal in many places. To make sure it grows well, you need just the right temperature and moisture.
For wheat seeds to grow, it’s best if it’s not too hot or too cold – about 20°C to 25°C is just right.
But sometimes, things don’t go as planned. If it rains too much right after planting the seeds, they might not grow well, and the young plants can get sick.
As the wheat grows, it faces more challenges like big swings in temperature and not enough rain.
Sometimes, when the weather is cloudy, damp, and chilly, a disease called rust can attack the wheat. And when the wheat is almost ready to be harvested, it likes a steady temperature of about 14-15°C.
Keeping the temperature and moisture levels just right is super important for getting a good crop of wheat.
To assist farmers and wheat producers in dealing with these challenges, we created this project. It’s all about making sure the temperature and humidity are just right for the best wheat crops.
The sample prototype of the wheat germination monitoring system is shown in Fig. 1.

Also Read: Smart Agriculture Irrigation System
Essential components for this project are listed in the below table.
| Bill of Materials | |
| Components | Quantity |
| LCD RG1602A I2C (MOD2) | 1 |
| Arduino NANO (MOD1) | 1 |
| Piezoelectric buzzer (P1) | 1 |
| DHT11 temperature sensor (S1) | 1 |
| 5V power adaptor | 1 |
Wheat Germination Monitoring System – Circuit
The circuit diagram for the monitoring system, aimed at optimizing wheat seed germination, is depicted in Fig. 2.
The circuit’s core revolves around the Arduino Nano (board1), an I2C LCD module (module2), a DHT11 humidity and temperature sensor (S1), jumper wires, a breadboard, a piezo buzzer, and additional essential components.
Please register to view this article or log in below. Tip: Please subscribe to EFY Prime to read the Prime articles.


